How To Prime A Coil
Andres RomanLet’s get real — the first time you heard someone say “you have to prime your coil,” you probably smiled, nodded, and hoped nobody asked follow-up questions. It sounds complicated, like something only hardcore vape wizards do while chanting over their RDA coils.
But surprise: learning how to prime a vape coil is actually super easy — and incredibly important. If you like your vape flavors not tasting like burnt toast and want your coil to last more than a day, you’re in the right place.
And hey, if you're brand new to vaping, check out The Complete Beginner’s Guide to Vaping to get yourself warmed up before we dive into this juicy (literally) topic.
What Is a Vape Coil?
Okay, real talk — vape coils are the part of your vape that heats up and turns your precious vape juice into those delicious clouds. Inside, there’s a metal coil (made from stuff like kanthal, titanium, or mesh) wrapped around cotton that soaks up your e-liquid.
Basically: electricity hits the metal, it gets hot, the juice evaporates, and bam, you get flavor. Vape science, baby.
There are two main coil types:
- Premade coil heads (you screw these into your tank)
- RDA coils (you install and wick these yourself like a DIY cloud ninja)
We’ll teach you how to prime both — because dry hits are the enemy.
Why Do You Need to Prime a Coil?
Two words: dry hits.
A dry hit is like licking a campfire. It’s harsh, burnt, and absolutely disgusting. This horror happens when the cotton inside your coil isn’t saturated enough before you fire it up. If you don’t prime your coil properly, that cotton will singe, your vape will taste like regret, and you'll have to replace the coil (again...and again...and $$$).
Priming your coil =
✅ No dry hits
✅ Better flavor
✅ Longer coil life
✅ Less crying at the vape store
Want to know even more about coil care? Don't miss How to Clean a Vape (Without Losing Your Mind) for extra pro tips.

When To Change Your Coil
Here's your checklist:
- Your vape flavors are suddenly MIA
- Every hit tastes like the inside of a toaster
- You're coughing more than vibing
If this sounds familiar, it’s time to swap that coil. (Sorry, no funeral required. Just twist and toss.)
Also, if you’re not sure what kind of coil metal you’re even working with, hit up What are the Best Vape Coil Metal Types? to get the lowdown on what’s inside your tank.
How To Prime and Break in Premade Coil Heads (Step by Step)
Alright, let’s talk premade coil heads — you know, those handy “screw it in and go” coils that come ready to party. These little cylinders of joy already have the wicking material tucked inside, and your job is just to make sure they’re nice and juicy before you fire things up. Let’s walk through it step by step, so you don’t end up tasting burnt regret.
Step 1: Out With the Old
Unscrew the old, burnt-out coil and replace it with your shiny new one.
Step 2: Juice It Up
Take your vape juice and drip 3–5 drops directly into the center of the coil. Don’t go full swimming pool mode — we’re saturating, not drowning. Add a few more drops to the visible cotton slots on the sides too.
Feeling unsure? You can repeat this twice if the cotton still looks thirsty.
Step 3: Rebuild the Vape Tower
Put your vape back together. Fill the tank with your fave vape flavors, then wait. Give it at least 10 minutes. Go do something. Pet a cat. Watch half a TikTok.
Step 4: Break It In
Start vaping at the lowest recommended wattage (check the box, manual, or the manufacturer’s site).
Take a few short, chill puffs. Then, increase the wattage by 5 watts.
Repeat until you hit your sweet spot — and there you go! You just learned how to prime a vape coil like a boss.
Curious about coil styles? Dive into Mesh Coil VS Regular Coil: Which one is Better? before your next upgrade.

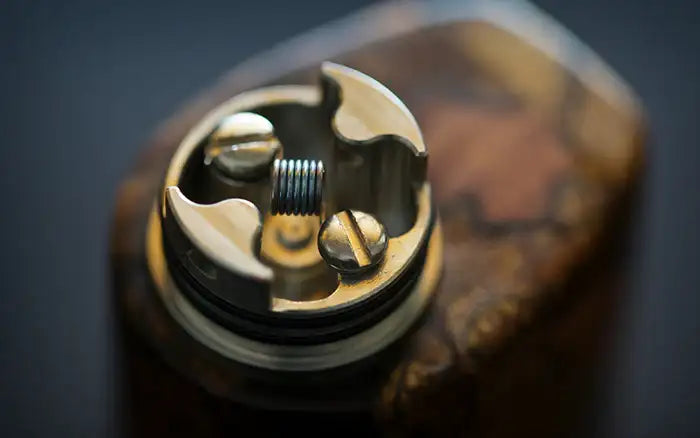
How to Prime and Break in RDA Coils (Step by Step)
Alright, RDA fans — it’s your turn. This one's for the build-it-yourself cloud chasers who love getting hands-on.
Step 1: Recoil and Re-wick
Unscrew the cap and get access to the RDA coils. Remove the old cotton, install your new coils (consult your manual — every deck is its own puzzle), and thread new cotton through the coils evenly.
Use tweezers to tuck the ends under the deck, but leave room for airflow. Air = flavor. Don’t choke it.
Step 2: Juice & Pulse
Drip 2–3 drops of juice directly onto the coil and cotton.
Gently tap the fire button. Don’t go full send — just enough to heat the coil and pull in that juice.
Repeat this: drip a little more, fire gently. Do it 4–5 times. If you see bubbles in the cotton, congrats — you’re saturating like a pro.
Step 3: Final Check
Give the cotton one last drizzle of juice and hit the button a few more times. You should see thick, fluffy vapor. Assemble your RDA, take a deep breath, and exhale greatness.
New to RDAs or curious about sub-ohming? Check out What is Sub-ohm Vaping? Everything You Need to Know for a crash course.
Conclusion
And there it is — no more mystery, no more burnt hits. Just you, your freshly-primed coil, and glorious, full-bodied vape flavors.
Knowing how to prime a vape coil might sound like niche wizardry, but really, it’s just good vape hygiene. You’ll save cash, save your taste buds, and maybe even earn some bragging rights at your next cloud-chasing showdown.
Still deciding between disposables and pod systems? Don’t miss Disposables VS Pod Systems — it’s the face-off you didn’t know you needed.
Happy vaping, and may your clouds always be fluffy and flavorful.
DISCLAIMER: EjuiceDB articles and blogs are meant to entertain and educate. However, we are not medical professionals and do not intend to give medical advice through them. Furthermore, Vaping products and nicotine use are only meant for persons over the age of 21.
Children, breastfeeding and pregnant women, persons with risk of heart disease, high blood pressure, diabetes, or that take medications especially for depression or asthma should not use nicotine or vaping products. Always consult a licensed physician prior to use.